Archive for April 2010


Go To Meal

April 22nd, 2010 — 6:47pm

Tonight I had my recent “go to meal.” You know the one that you almost always have the ingredients for and the one that almost always sounds good.  But first, lunch!

 IMG_6154

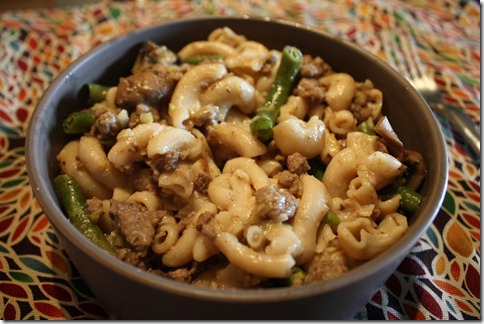
This is a goulash that I made the other night. In that bowl is leeks, garlic, green beans, grass fed ground beef, salt, curry, coconut milk, and GF noodles.  I just threw it together last minute the other night and it was GOOD.

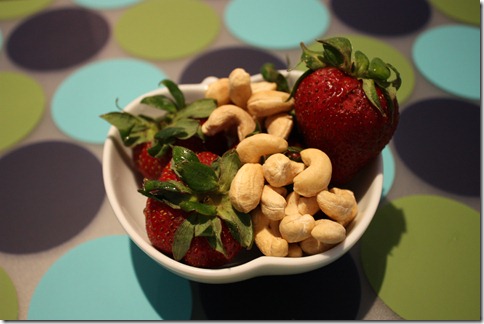
Here was my snack, with my new placemats:

IMG_6155

~15 cashews and 5 strawberries.

And then, onto my go to dinner:

IMG_6156 

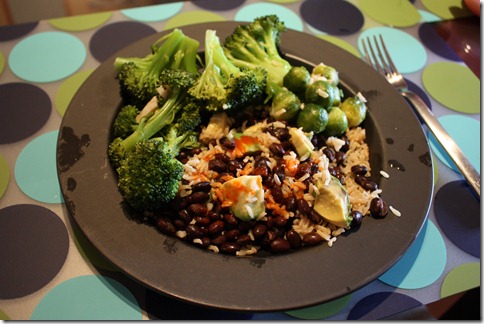
Rice, beans, avocado, and Tapatio.  YOM.  I also made some broccoli and brussels sprouts with garlic and a bit of coconut oil.  ‘Twas delish!

It was girl’s night while “Dada. Go. Bike.” (according to Lu).

Lu says “What?”

IMG_6158

She no longer tolerates a baby fork. I tried to give her one since our smaller metal forks were all dirty but she begged for a metal one.  So I gave her a big one. Surprisingly, she did quite well.

IMG_6159IMG_6160 IMG_6161 

She’s getting too cute for words.

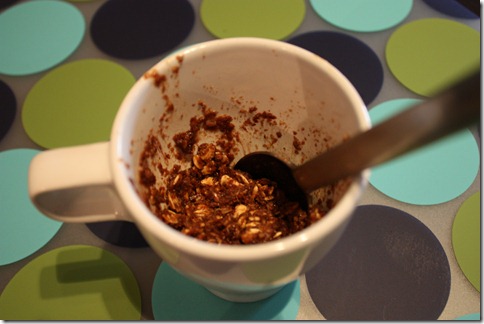
Lastly, I had a really gross looking dessert.  I took about 1/4 cup oats, 2 TBSP ground flax, 2 TBSP water, 2 tsp honey, and 1 tsp cocoa powder and mixed it up and nuked it for about a minute.

IMG_6163

It wasn’t my best concoction but it certainly wasn’t my worst!

Survivor’s on tonight!!!!  YIPPEE!!!

2 comments » | Uncategorized

Back and Forth

April 22nd, 2010 — 8:33am

And now I’m back.  I’ve been struggling a lot lately with feeling like I’m working so hard and I’m not losing weight.  Then I question whether I’m really feeding myself sane portions and I question what I eat.  I think it really helps for me to write down and take pictures of what I eat so that I have PROOF that I’m eating like a sane person.  So here goes.

I already forgot to take a picture of my piece of toast that I had before taking Lu to daycare but it looked just like this:

image

I’m working from home today and I decided to go to Target in the time I usually take for commute. I got to Target before the doors opened!!  I just had to get some toiletries there but I also scored some cute rain boots:

IMG_6149

And some new Chucks for Lu:

IMG_6150

As I was checking out, the cashier asked me if I had an coupons.  Sadly, I said no.  One of my goals when I move to Boise is to be MUCH better at coupons.  I’m really horrible at it right now and I could be saving SO.MUCH.MONEY.

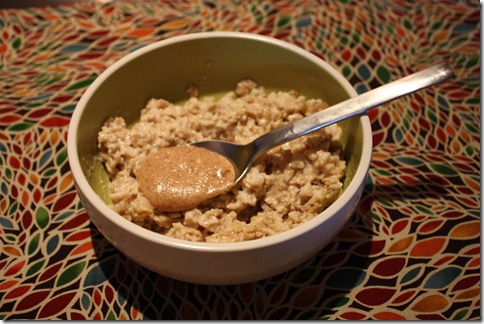
When I got home from Target I made some oatmeal:

IMG_6148 

-1/2 cup GF oats
-1 cup homemade almond milk
-dash of salt and cinnamon
-2 tsp maple syrup
-1 TBSP homemade almond butter

I figure getting back to showing what I eat will show people that being Gluten Free ISN’T awful.

And?  If I get funny looks for taking picture of my food at work?  I’ll just tell them I’m working on my photography skills and to SUCK IT!

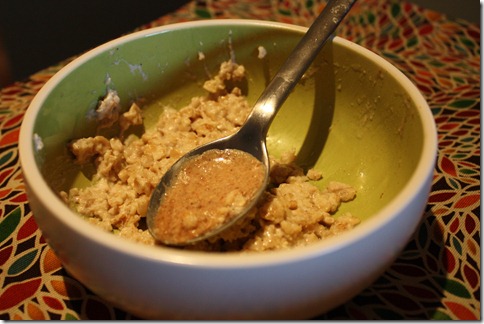
It turns out that I was only able to eat about half of the oatmeal.  Here’s what was left in the bowl:

IMG_6153

Ahhh…it feels good to be back 🙂

4 comments » | Uncategorized

I’ve Been Keeping a BIG Secret from You

April 19th, 2010 — 9:20am

I don’t know if you’ve noticed but I haven’t been as chatty about my personal life lately.  There IS a reason.  Back in February we made a HUGE life changing decision that I could NOT talk about on the blog.  I am a HORRIBLE secret keeper and so I just stopped talking about life for fear of spilling the beans.

Well…now I can tell you.

We’re MOVING TO BOISE, IDAHO at the end of June!!!!

Why? You ask.  Well the main reason:

image

image

image

image

We’ve actually been talking about moving for a VERY long time-WAY before we even had Lucy.  Living in the Bay Area is great but it’s EXPENSIVE and not sustainable.  Even more so now that we have Lucy. 

We have a list of what’s important to us and when I went to Boise in February for Tessa’s birthday in dawned on me that Boise fit our list.  Before that, we had always said that we would move to Pennsylvania by Shaun’s family but the fact that we couldn’t find a town near his family that fit our list always stopped us. 

Here’s the list.  What’s highlighted in purple is what Boise has that Pennsylvania does not:

-Family (Pennsylvania actually wins out here since Shaun’s ENTIRE family is there and his brothers live within 3 miles of each other)
-Affordable
-4 seasons
Lots of sunny weather
-Good public schools
-Good place to raise a family with lots of young families (Something the Bay Area IS NOT!)
-Walk-able downtown with nice houses nearby
-Access to ethnic food
-College Town
-Mountain biking nearly year round
-Very outdoorsy community
-Natural grocery store
-A nice gym where I could imagine working out
-Jobs! That PAY!
-Short commute

Another thing Pennsylvania had but that Boise does not is a big city within driving distance.  In PA we would have been close to New York City, Washington, DC, and Philadelphia.  In Boise?  Not so much.

When we were making the decision, we first did a pros and cons list for staying vs. leaving and the pros WAY out weighed the cons.  But then when we were deciding between Idaho and PA we sat down and PA almost  won out.  Shaun and I were willing to overlook all of the things that Boise had that PA didn’t because of his family.  Shaun REALLY misses his family (as do I) but then we sat down and did a budget and looked at housing.  It turns out that it is SIGNIFICANTLY cheaper to rent a nice house in Boise than it is in the Wilkes-Barre-Scranton area.  When we were comparing Shaun said “This isn’t fair-there’s no comparison.”  Add to that our projected heating bill and gas bill (for a long commute for Shaun) and the decision was made with the stipulation that we visit PA at least once a year and for at least 2 weeks per year-it got built into our budget.

So Boise it was!  Before we could move forward though I had to see if I could work remotely.  The only way we were willing to make such a huge life change was if I could keep my job.  I was SO nervous going into that meeting to talk to my manager BUT she gave me a resounding YES!  She fully supports this move and come July 1st I will be working from home!  Shaun will be a stay at home Dad while he looks for a job in Boise and we’ll be sharing a baby-sitter with my sister for about 20 hours per week.

When we went out earlier this month, it was to scope it out and make sure that this was the right decision.  We went to look at neighborhoods to see where we wanted to live, I went grocery shopping, Shaun went mountain biking (everyday), we went hiking.  We did things that we would do if we were to live there.  And, even though the weather was absolutely miserable, we LOVED it.

While out on our neighborhood scouting trip, we came upon a house that was for rent and Shaun called.  The property manager said that he was having a open house and that we should come to meet him and tell him what we like so that he could look for properties for us when we came out.  We were planning to go back in June to secure housing.

Well…we went to the open house and we fell in love.  Shaun kept looking at me like OMFG.  When we got back in the car, my super conservative, hates to waste money, husband said, “We’re renting that house and just swallowing the 2 months that we can’t live there.”

Before I agreed to that, I said that we had to look at EVERYTHING in that price range (inside and out) and if we still thought this house was the one, then we would get it.  That house was still the one.

We sign our lease TODAY!

Welcome to my new home:

image

It’s set off the street and the street is not very busy.  It’s half a block from the mountain biking and hiking trail heads (yes! HALF a block!), 2 miles from my sister, 1 mile from downtown, and 1/2 mile from the Greenbelt-which is a running/biking path that runs along the river.  It’s also about a mile and a half from the Y and I’ll be riding there with Lucy in the bike trailer A LOT!

The upstairs has been recently remodeled. And the kitchen is BEAUTIFUL.

image

image

image

image

Large living room:

image

Master bath with a deep tub with JETS!

image

Master Bedroom (which has a walk in closet):

image

I didn’t get pictures of the down stairs but there are 2 bedrooms down there, a den, an OFFICE, and a laundry room.

The other thing it has? A HUGE backyard (that needs some love and care 🙂 ) and 2 car garage with extra storage:
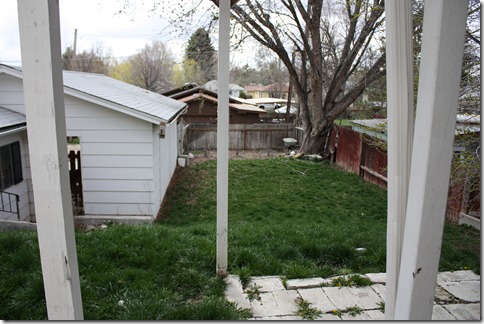
IMG_5835 IMG_5832

And an AWESOME deck that is right off the kitchen.  This house is PERFECT for entertaining.
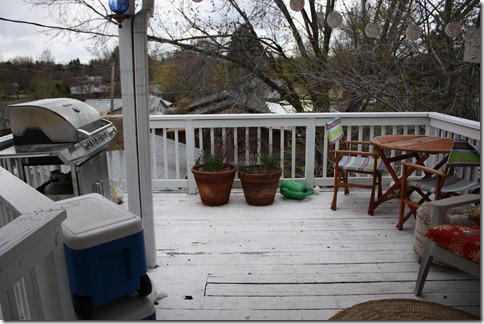
IMG_5833

Goodbye 1200 square foot condo with almost no storage and NO yard.  Hello 1700 square foot house with an additional 2 car garage and HUGE yard.  I love you!

Needless to say, we are VERY excited.  I wish we could move now but Shaun is working through the beginning of June and then his brother and nephew are coming to visit and THEN we drive to Boise, Idaho to start our new, less hectic, more family oriented life.

Are you ready to join me on this ride?

33 comments » | Uncategorized

BIG Sandwich!

April 18th, 2010 — 11:22am

Shaun had a mountain bike race this weekend (he did GREAT BTW!) and I made him a BIG Sandwich to take down to Monterey.  My parents used to make BIG Sandwich in the summer and I have very fond memories.  Sadly, I don’t see any BIG Sandwich in my future.  It is decidedly NOT Gluten Free!

IMG_6088

Ingredients:

-1 loaf of French bread
-Mayo
-Mustard
-Wishbone Italian dressing
-3/4 pound turkey
-3/4 pound ham
-1/2 pound salami
-1/2 pound provolone
-Sliced pickles (I’m very partial to Clausens)
-Sliced pepperoncinis
-Tomatoes (if desired)
-Thinly sliced purple onion (if desired)

Instructions:

-Cut the bread in half.

-Spread mayo and mustard on bread and then squirt Italian dressing on both sides of the bread and spread that.

-Starting with cheese, line BOTH sides of the bread evenly with cheese.

-Then layer the meat evenly on both sides of the bread.

-Next, put the pickles and pepperoncinis (and onion if using) on the bottom bread piece.  Carefully, place the top of the bread on top of the bottom of the bread.

IMG_6087

-Serve tomatoes on the side as they’ll make the sandwich too mushy.

-Cut the sandwich into about 2 inch sections.

-Stand back and watch while people groan in appreciation.

Shaun, hands down, rates this a 5 out of 5.  I don’t make it THAT often though because it is NOT CHEAP.  He had a big group of his mountain bike friends over to his car after their race and they ate BIG Sandwich and had beers.  Shaun reports that I am a “Goddess” in his friends eyes.  I can deal with that. 😉

I made that right before bed on Friday night and had dreams of eating French Bread and cookies all night long. 🙂

3 comments » | Recipes

Stuffed Cabbage

April 14th, 2010 — 4:56pm

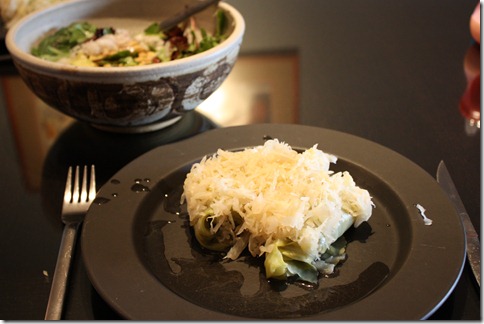
I’m married to a Pennsylvania boy and I’m a California girl.  When we met our food preferences were VERY different.  They still are but we’ve found some common ground.  One thing that Shaun asked me to make and that I had never had was Stuffed Cabbage.  An acquaintance gave me a recipe, which I modified (in true Chelsea fashion) and now this is one our most favorite meals.  It even awakened a love of Sauerkraut that I never knew I had!

IMG_6016

Ingredients:

-1 head of green cabbage
-1/2 onion, chopped
-6 cloves of garlic, chopped
-1 pound leanest ground beef (ground poultry works well too)
-8 ounces of mushrooms, chopped
-1.5 cups cooked rice/grain
-1 TBSP Braggs Amino
-2 tsp garlic powder
-Ground pepper to taste
-1-16oz can of chopped tomatoes (optional-I can’t have tomatoes right now but I usually do add this)
-1 jar tomato marinara (optional)
-1 large jar of Sauerkraut

*The filling is the same as my stuffed peppers

Instructions:

-Preheat the oven to 350*

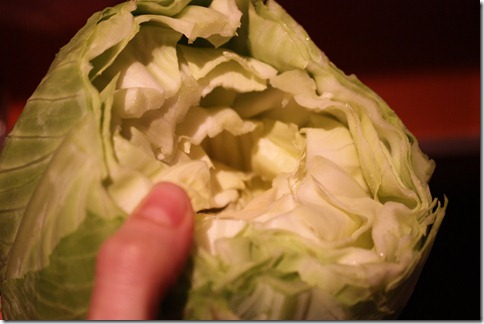
-Cut the stem off of the cabbage.

IMG_5984

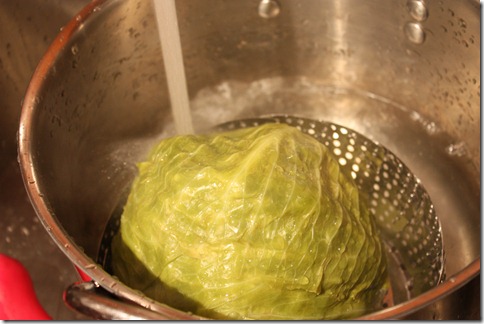
-Steam the cabbage for about 15 minutes or until the leaves are wilted but still hold shape.

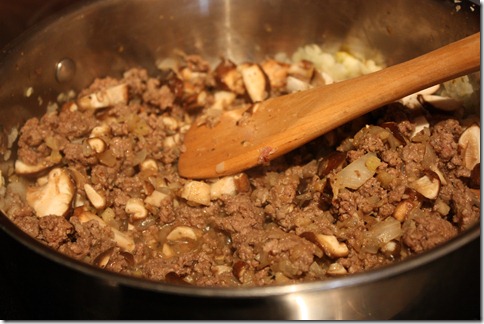
-While the cabbage is steaming, brown the onions and garlic until glistening.  Add ground beef.

-Once the ground beef is almost cooked, add the mushrooms and seasonings.

IMG_5985

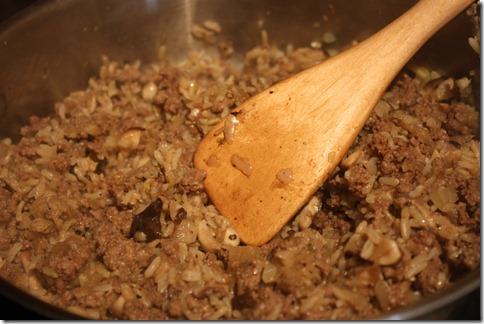
-Add the cooked rice and stir to incorporate.

IMG_5986

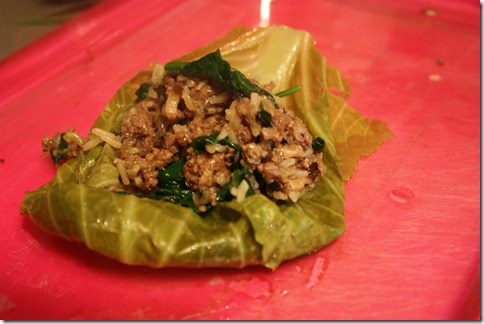
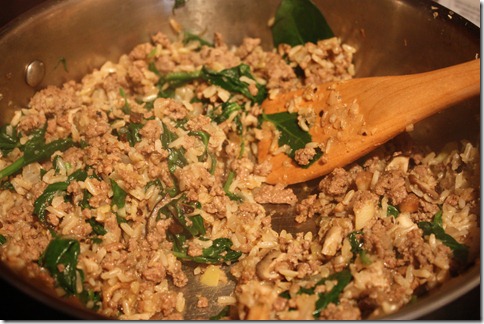
-I have an abundance of spinach so I added some of that too (really you can throw anything that wilts down in this filling). This is the point where I would normally add the tomatoes.

IMG_5988

-When the cabbage is done, douse it with cold water so that you can handle it.

IMG_5987

-Take one leaf of the cabbage and put about 1/4 cup of filling into it (in a rectangle pan).

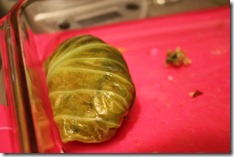
IMG_5989

-Fold the cabbage around the filling to make a sort of burrito. I fold the sides in first and then use the stem and the base of my rolling.

 IMG_5990IMG_5991

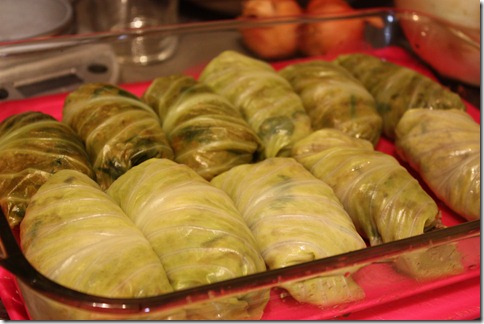
-Repeat until you’ve used all the filling.

IMG_5992

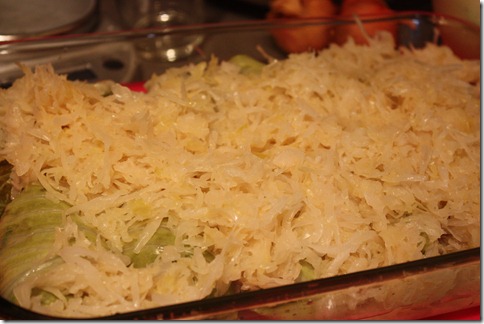
-Cover with sauerkraut-including the juice from the jar (and marinara, if using).

IMG_5993

-Place in oven and cook for about 20 minutes or until the sauerkraut juice is bubbling.

-ENJOY!

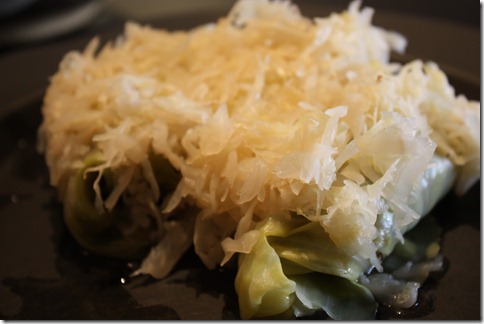
IMG_6015

Shaun rates this a 5 out 5.  I give it a 4.  It’s really good but I find I need some additional veggies to accompany the meal (see the salad in the first picture).  Before this recipe, I HATED sauerkraut.  The fist time I mad this I made two pans, one with and one without.  The without pan just had tomato sauce.  I decided to try Shaun’s and it was SO.MUCH.BETTER.

See?  The Pennsylvania boy really did teach me a trick or two.  Don’t even get me started on pierogies!
13 comments » | Gluten Free, Recipes

Granola Bars

April 14th, 2010 — 4:30pm

I’ve been meaning to post this recipe for weeks and my sister just asked me for it.  She actually had the granola bars and the fact that she wants the recipe tells me that it’s worth posting.  I never know when it’s something that only I eat. 

My best friend Elaina actually gets all the credit for this recipe.  It is her brainchild and I just changed it up a bit to make it friendly for my food restrictions.

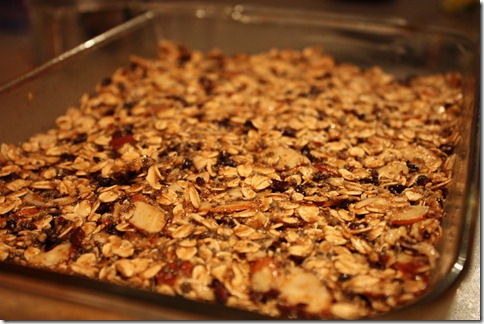
IMG_5646

Ingredients:

2 cups GF whole rolled oats
1 cup sliced almonds
1/2 flax meal OR sesame seed meal
1/4 cup reduced fat unsweetened coconut (shredded)
1/2 cup raw honey
1/4 cup maple syrup
1/4 cup unsweetened applesauce
2 tbsp natural almond butter
2 tsp natural vanilla extract
1 tsp cinnamon
1/2 tsp salt
1 scoop GF chocolate protein powder
1/2 cup chia seeds
3/4 cup cacao nibs

Instructions:

-Preheat oven to 350 degrees. Grease an 8×8 (thicker bars) or 9×9 (thinner bars) baking pan with nonstick cooking spray.

-Spread the first 4 ingredients (oats, almonds, flax/sesame meal, coconut) onto a shallow rimmed baking sheet. Put in oven 15 minutes, stirring once or twice.

-Meanwhile, combine all of the remaining ingredients except the chia seeds and cacao nibs in a medium saucepan. Cook over medium/medium-low heat until everything is dissolved and the texture is thin enough to easily pour. Stir frequently, and be careful not to scorch.

-Once the dry ingredients are toasted, remove them from the oven and turn the temperature down to 300 degrees. Once the dry ingredients are cool enough, combine them and the chia seeds and cacao nibs in a large mixing bowl and mix thoroughly.

-Slowly stir in the honey mixture, completely coating the dry ingredients.

-Immediately tip the contents into the square baking pan and flatten down with a spatula or wooden spoon. Be sure to firmly pack the contents into the pan.

-Bake for 25 minutes. Remove from the oven and let cool completely.

-Leaving the contents in the baking pan, cut into bars. Put the pan in the fridge to harden the bars the rest of the way.

-After 30 minutes or so, remove the pan from the fridge and liberate your granola bars. (total Elaina-ism that I’m keeping in here =D)

-Store in the fridge.

-Enjoy!

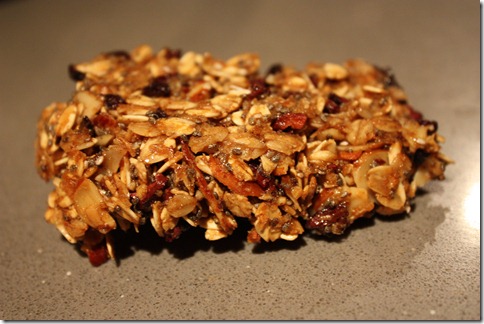
IMG_5650

I LOVE these things and totally give them a 5 out of 5.  They are softer than most granola bars and sort of fall apart but I don’t mind that at all.  They take some time, but are WORTH IT.  My niece, Tessa, LOVED them as well.  Lu likes them sometimes-when she’s in the mood ;).  Shaun, who usually turns his nose up at these sorts of things said it was good. 

Of note, Elaina uses plain protein powder and 1 cup dried fruit instead of the chocolate protein powder and cacao nibs which would be delicious too.

They are a great oatmeal, yogurt, and ice “cream” topper as well.

26 comments » | Gluten Free, Recipes

Flexible

April 13th, 2010 — 8:16am

…is something you need to be when you’re a working Mom.  I had plans last night of making stuffed cabbage but I had to stay at work later than expected so a quick chicken stir fry had to suffice.  Stuffed cabbage tonight!

I went to the gym again this morning.  I’ve decided that I really hate weight lifting.  My reason?  I hate staring at myself in the mirror.  It’s a good idea to look at yourself in the mirror while you’re lifting weights to make sure your form is correct but ugh I really don’t like what I see when I look in the mirror.  At least I’m working on it, right?
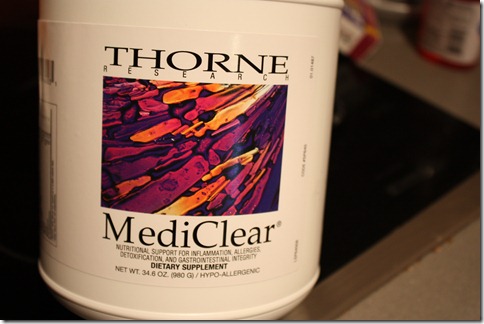
I’ve been making green smoothies every morning using some new protein powder that I got from my doctor.

IMG_5982

It’s not cheap and it’s kind of chalky but it gets the job done.

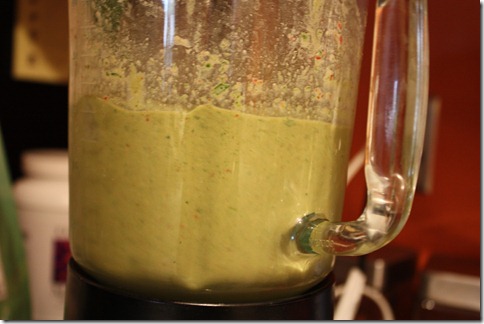
IMG_5983 

In that bad boy:

-1 scoop protein powder
-2 TBSP ground sunflower seeds
-1 cup homemade almond milk
-~6 frozen strawberries
-~2 cups spinach

Since there’s nothing SUPER sweet in it, it kind of tastes like a savory smoothie.  Which sounds disgusting but really it’s not-I think it just takes some getting used to and, as I said above, it gets the job done.  It’s interesting.  I overall enjoy most everything I eat but I’m okay with just eating something if it is nourishing.  Is that weird?  Should I be striving to be excited about every meal?  I kind of like that I’m not stressing to LOVE every meal.  It means I don’t eat as much-ha!

As for the homemade almond milk, a lot of you commented yesterday on how brave I was to try it.  It’s REALLY easy.  I followed Tasha’s instructions.  With the addition of a nut bag, I think it’ll be REALLY REALLY easy.  It tastes really fresh and like almonds-big surprise.  It’s not quite as sweet as the milk you get at the store (even the unsweetened) but it has a LOT less ingredients-only 2-almonds and water.  And now I have almond meal!  I’m ready to try some soy milk and cashew milk!

Next up on my almond adventure? Almond butter.  I think I’m going to tackle that on Thursday. First I need to have some oats in a jar to clean out my almond butter jar and get it ready for some homemade action!

7 comments » | Uncategorized

400

April 12th, 2010 — 10:51am

That’s the amount of calories that I burned this morning.  YAY!  I don’t know if you’ve noticed or not but I have NOT been talking about working out.  That’s because it hasn’t been happening :(  I was exhausted, then I got sick, then I went to Boise.  But now?  It’s on!

I went to spin class and it was a good one! I have plans to go back tomorrow. WOOO HOOO!

The weekend was okay.  I had a horrible migraine on Saturday that basically put me out of commission.  I think it was caused by allergies and it sucked.  Allergies are hitting my household HARD this year.

What else happened this weekend?  Lu moved from high chair to booster!  She now sits at the table with us.  Check her out!

IMG_5978

She’s becoming such a big girl.  It makes me happy and sad all at once.  She’s growing and learning everyday and that is exciting but I do miss my little newborn from time to time.

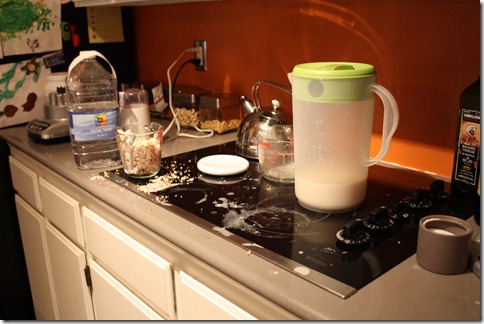
I didn’t cook this weekend-it was strange but we ate leftovers and sushi.  I usually cook a BUNCH over the weekend but with the migraine it just didn’t happen.  I did make some of my own almond milk.  It was really easy but MESSY.

IMG_5980

I got almond meal everywhere!

IMG_5981

I used a cheese cloth and will be using a nut bag from here on out.  I already bought one on Amazon and it should get here on Wednesday.  I also want to go and get some of the local milk that comes in a glass bottle.  I’ll then use the glass bottle to store the milk because my container up there is HUGE and takes up too much space in the fridge.

Up for tonight?  Stuffed cabbage-look for a recipe 😉

7 comments » | Uncategorized

Evil Agave

April 9th, 2010 — 6:52pm

Do I really think agave nectar is evil?  Only about as evil as high fructose corn syrup.

..Agave plants are crushed, and the sap collected into tanks. The sap is then heated to about 140°F for about 36 hours not only to concentrate the liquid into a syrup, but to develop the sweetness. The main carbohydrates in the agave sap are complex forms of fructose called fructosans, one of which is inulin, a straight-chain fructose polymer about ten eight to 10 fructose sugar units long. In this state, the sap is not very sweet.

When the agave sap is heated, the complex fructosans are hydrolyzed, or broken into their constituent fructose units. The fructose-rich solution is then filtered to obtain the desired products that range from dark syrup with a characteristic vanilla aroma, to a light amber liquid with more neutral characteristics. [source]

Sounds eerily similar to the way high fructose corn syrup is made:

High-fructose corn syrup is produced by milling corn to produce corn starch, then processing that starch to yield corn syrup, which is almost entirely glucose, and then adding enzymes that change most of the glucose into fructose. The resulting syrup (after enzyme conversion) contains approximately 90% fructose and is HFCS 90. To make the other common forms of HFCS (HFCS 55 and HFCS 42) the HFCS 90 is mixed with 100% glucose corn syrup in the appropriate ratios to form the desired HFCS.                      [source]

I think that agave is a highly processed sugar that has been marketed really well to make people think that it is healthy.  In fact, “Amber” or “Dark” agave nectar is just parts of the plant that have burned in processing.  That’s some great marketing-that I totally fell for.

I had done all this research but was still using agave (maybe because of the hype?) but then my doctor told me to stop using it immediately and to only use natural sources of sugar-honey and maple syrup.  So that’s what I do.  I don’t miss it and I find that just replacing agave with honey works perfectly in recipes.

What do you think?

A sampling of articles on the topic:

http://www.westonaprice.org/Agave-Nectar-Worse-Than-We-Thought.html

http://articles.latimes.com/2009/mar/30/health/he-nutrition30

http://www.living-foods.com/articles/agave.html

http://www.foodrenegade.com/agave-nectar-good-or-bad/

17 comments » | Uncategorized

Chocolate Cake-Gluten, Dairy, and Egg Free!

April 8th, 2010 — 2:42pm

I recently purchased Lauren Hoover’s No Wheat No Dairy No Problem cookbook.  She’s a pastry chef who discovered that she’s allergic to both wheat and dairy.  She made it her mission to make yummy recipes.  This book accomplishes that.  The layout and look and feel of the book are not great but I can get past that.  Her desserts are what really jump out at me, all the other recipes, I feel like I could make gluten free on my own.  It makes sense, since she’s a pastry chef!

While in Idaho, I made her chocolate cake with some modifications.  She uses agave in her recipes and I don’t use agave anymore.  I also made some other tweaks to make the ingredient list not as exotic and expensive.  Though this cake is spendy-I won’t lie!

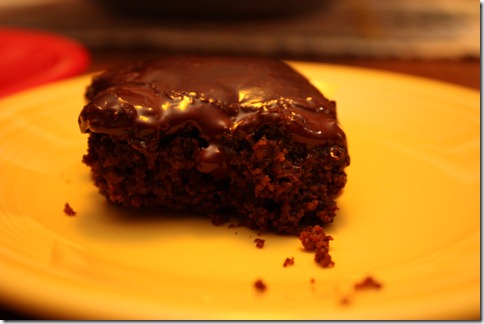
IMG_5800

Gluten Free desserts don’t have to taste like ass-YAY!

Ingredients:

For Cake:

-3 cups oat flour (you can just take GF oats and process them in the food processor to make GF oat flour-it won’t get super fine but it bakes up really well)
-1/2 cup cocoa powder
-2 tsp baking soda
-2 tsp baking powder
-1 tsp salt
-1/2 cup canola oil
-3/4 cup pure maple syrup
-3/4 cup honey
-2 cups light coconut milk
-2 tsp apple cider vinegar
-1 tsp pure vanilla extract

Cake pan needed:1 9×12 or 2 8-inch rounds

For Frosting:

-12 ounces at least 72 % dark, dairy free chocolate (I found chocolate chips and it was the cheapest way to go BY FAR)
-1 can of whole coconut milk (not light)
-1/2 cup cocoa powder
*If you use super dark chocolate, add some honey or maple syrup to taste, to sweeten this up a bit.

Instructions:

-Preheat oven to 350*. Oil pan (1 9×13 or 2 8 inch rounds) and coat with oat flour, remove excess.

-Combine all dry ingredients and stir.

-Combine all wet ingredients, stir, and add to dry ingredients.

-Mix until just smooth.  Do not over mix.  The batter will appear VERY watery-have faith!

-Pour into cake pan(s) and bake for 40-50 minutes or until a toothpick comes out clean.

-Let cool. If using round pans, remove cake from pans and let cool on wire racks.

-Once cool, bring the coconut milk to a boil on the stove.

-Pour the hot coconut milk over the chocolate and cocoa powder.

-Mix until smooth (I just used a spatula).

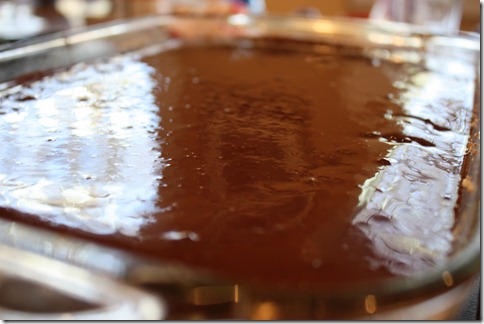
-Pour over top of cake.

IMG_5780

-ENJOY!

Yom! I give this cake a 4.5 out of 5 stars.  Shaun and my brother-in-law LOVED this and gave it a 5.  Here’s the rating system in case you’re new ;)  The cake was devoured in about 3 days.  It’s not too sweet and you’d never know it was missing gluten, dairy, or egg!  If it were a little less crumbly and more dense, I’d give it a 5!

14 comments » | Gluten Free, Recipes

Back to top